How to Create a Form
TABLE OF CONTENTS
Single Page Contact Us Form
The Single Page Contact Us form is customizable for collecting various customer inquiries, such as hiring, partnership, or reservations, providing a streamlined way for customers to reach out.
Create Form: To initiate the creation of a new form, simply click on the "Create" button.

Select Template: We are going to choose the "Single Page Contact Us Form"

Note: Once saved during the creation, you are not allowed to change the template for the form in the future edit setting - you may choose to create a new form if you wish to create a form with a different template.
Set Form Details:

- Name Your Form: By naming the form, the name will be displayed on the form dashboard (for internal use only - the customer won’t be able to see the name of the form)
- Choose Brand: You can only select 1 brand for the form created. One brand is allowed to create multiple forms but you cannot share the same form with multiple brands. (Once the form is saved, you cannot change to another brand in the future)
- Details above must be filled up to proceed to step 3.
Build Form:
General:

- Brand
- The brand name is non-editable.
- If you wish to switch to a different brand, you may create a new form or return to Step 2 Set Form Details before saving the form.
- Title
- An editable text box. This affects the text that appears on your form.
- An editable text box. This affects the text that appears on your form.
- Introductory Message
- An editable text box. This affects the text that appears on your form.

You may choose to display or not display by toggling the button. If you toggle off the three above, the line seperator will be gone too.

- Terms & Conditions
- An editable text box. This affects the text that appears at the bottom of your form.
- By default, Momos provides a generic terms & conditions template to cover general privacy policies. You can link your own privacy policy to ensure it covers everything important for you.

- Button Title
- You can change the label of the button

- You can change the label of the button
- Default Questions
- By default, we will have 4 questions in the Contact Us Form.
- 3 Fixed Questions (cannot be toggled off but you may edit the question text):
- Name: An editable textbox with the label “Enter name”
- Email: An editable textbox with the label “Enter email”
- Inquiry Type: "What would you like to contact us about?" - How may we help you out today?
- By default, it is an editable long text box
- It can’t be deleted but you can choose to toggle it off
- You may edit the title to use this question for other purposes

- By default, we will have 4 questions in the Contact Us Form.
- Inquiry Type: What would you like to contact us about?
- By default, we have Complaint, Dine-in Experience, Online Ordering, Hiring, Reservations
- If you wish to add new inquiry type, just click on + Add New Inquiry Type.
- Example of use case: Marketing/Partnership/Catering Request etc.

Each inquiry type, you have the option to:
- Edit the title of inquiry type
- Toggle it on to display in form or off to remove from the inquiry type dropdown
- Add a new inquiry type

For each inquiry type, you may click on it, in the dropdown you will be able to see Add New Sub Question.
- The sub-question in each inquiry type will only be displayed when the customer chooses the inquiry type.
- This is to ensure we asked relevant questions/collect relevant informations to the selected inquiry type

For Hiring, the sub-questions can be:
- Job Position
- Upload Resume
For Reservation, the sub-questions can be:
- Reservation Date & Time
- Number of Pax

- You may make the question mandatory by checking the Required? Checkbox
- ☑️ = Mandatory question, answer must be input to proceed to next step
- Unchecked = Answer can be blank
- You may create multiple sub-questions
- Toggle it on/off for visibility on form
- Click the bin button to delete
Add New Question
Short Text Box:

Long Text Box:

Move the mouse to the bottom right corner, you will be able to expand the size of the long text box

Number:
- Only allow number input
- The arrow at the side can be used to adjust the number value

Phone Number:
- Country code + number input
- Country code will default to the brand country code

Date:

Time:

Checkbox:
- If you made it as required, customer will need to tick the box in order to proceed to next steps

Location Dropdown
- Toggle the location to display the selected location in the dropdown

File Attachment
- Customer is allowed to upload multiple files

Text
- A customizable text display.

Click & hold the button to arrange the sequence of questions on the form

Styling:

- Hero Banner
- Upload banner to be on top of your form
- Upload banner to be on top of your form
- Brand Logo
- Will be above the Brand Name
- Will be above the Brand Name
- Header Background Color
- By default is white, color can be change by color code or color picker, same applies to the below color.
- To make your background transparent, just add 00 at the end of the code.
- Header Font Color
- By default is black
- By default is black
- Header Title Font

- Body Background Color
- By default is white
- To make your background transparent, just add 00 at the end of the code
- Body Font Color
- By default is black
- By default is black
- Body Font Type

- Show Powered by Momos
- Toggle off to remove Powered by Momos at the bottom of form

Social:
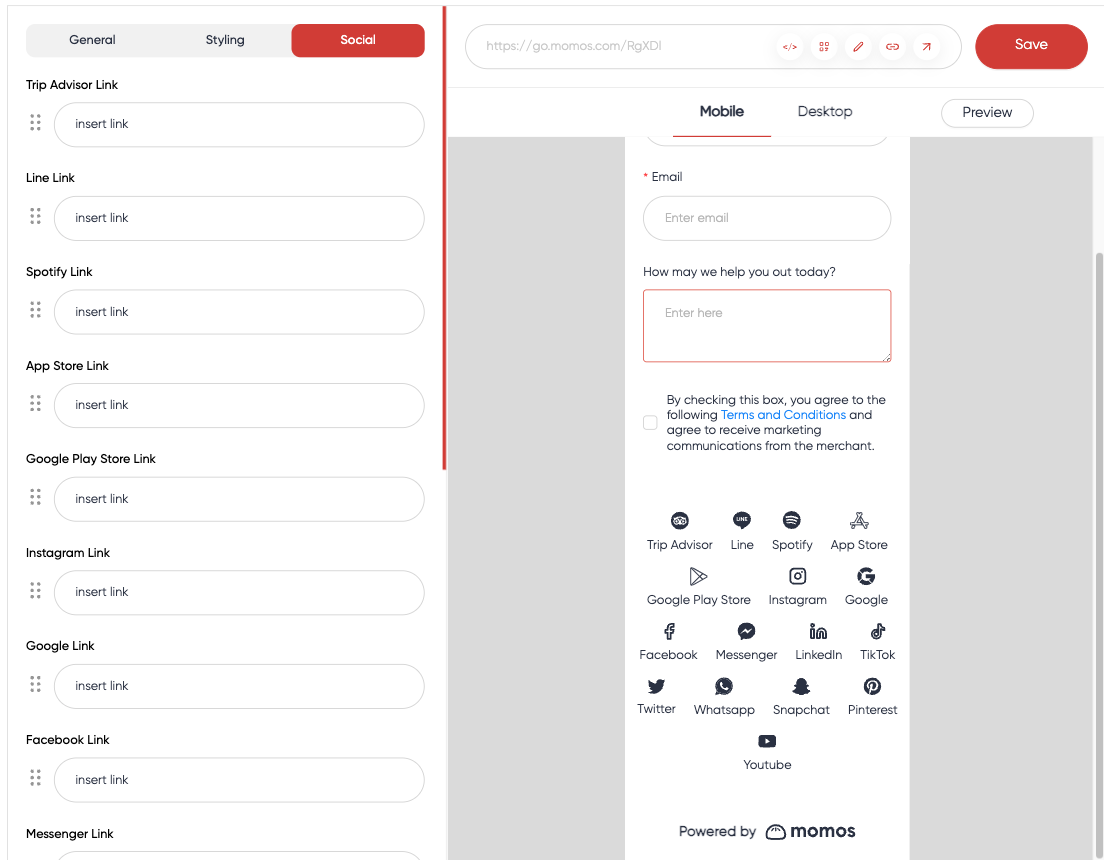
- Insert your links to direct your customers to your desired social media landing page.
Preview:

- You can preview your form in Mobile and Desktop format. You can see your form fully by clicking on "Preview"
After doing your customization and you're happy with your preview, click "Save" to proceed.

Set Permissions:
- Set permissions for users’ access to the form
- By default, only the account admin user has access to edit or view the form submission
Users with Edit Permission:
- Only users added to this has access to edit the form

Inquiry Type Permissions:
- By default, only the account admin users has access to the form submission, the rest of the user will not be able to access
- By clicking the dropdown, you can set the permission for each inquiry type for the users for all locations
- None: No access at all
- View only: Can read but cannot reply
- Reply: Can read & reply

- If you would like to grant access on location level, toggle on and set permission for the location accordingly.

- If some users share the same access level, you can use the duplicate icon of the user and apply the same access level to another user.

Winback Form
The difference here with the Contact Us Form is Google Winback Form can be only used for Google Negative Rating Reviews
Just follow the same steps as Single Page Contact Us form however this time, we will select the "Google Review Winback" Form as our template.

- A unique link will be generated and the form will auto populate the review details to the form
- By default, there are 3 questions type
- Name (Fixed)
- Email (Fixed)
- Phone Number

- You can add new questions, and customize your form just like in the Single Page Contact Us Form.
- When you're happy with your form, you may then save and proceed to User Permissions.
Was this article helpful?
That’s Great!
Thank you for your feedback
Sorry! We couldn't be helpful
Thank you for your feedback
Feedback sent
We appreciate your effort and will try to fix the article